How to change the color on Renu devices

One of the benefits of Leviton’s Renu line of electrical devices is the ability to quickly change the color of an installed device to one of the 19 other options available.
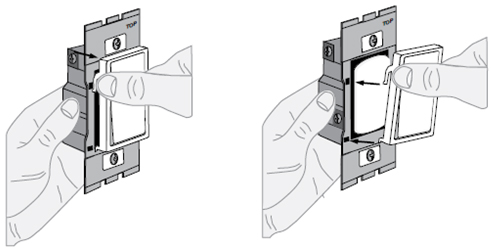
Switch: Push in the sides of the faceplate at the tabs, and gently pull to release the faceplate. Add a new faceplate by inserting the bottom tabs, and then pivoting the upper tabs into place, one at a time.

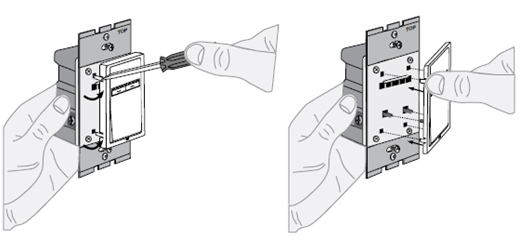
Dimmer: With a flat-head screwdriver, push in the tabs on the left side of the device, and rotate right to release the face. Insert the tabs on the right side of the new face, and rotate left to insert.

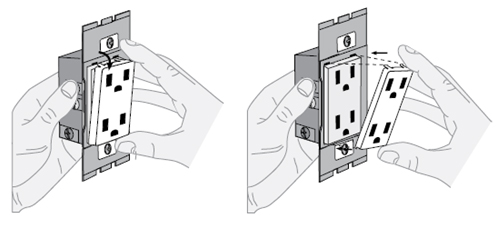
Outlet: Push down the tabs one at a time and rotate the face towards you to release. To attach the new face, insert the bottom tabs, and then pivot towards the device to snap on the top tabs.

GFCI: Push down the tabs one at a time and pull the device toward you to release the face. Be sure to pull out the TEST and RESET buttons. Insert the new buttons, and attach the bottom tabs of the new plate in first, and then snap the top tabs into place.

Wallplate: Use a flat-head screwdriver to lift and separate the bottom of the screwless wallplate from the subplate. Pull upwards to release the face plate. Line up new plate over the device, and push forward to snap the wallplate in place.


